|
The original intention was always to build the luggage from aluminium. Advantages: Lightweight, corrosion free, available in angle form in the right dimensions. Disadvantages: Hard to weld. The disadvantages in this case have outweighed the advantages; after weeks of practicing oxy-acetylene welding aluminium I've come to the conclusion that when each piece of luggage requires 21 distinct welds I won't be able to keep every single weld consistently to the standard I'm looking for. I've made the decision to make the structure of the panniers in steel, but will still use aluminium sheet for the panels. This is both a setback in terms of time and money spent on the original aluminium angle that I purchases and had cut and bent to size while I continued to practice the welding, however I'm far more confident in being able to weld the steel to the standard I'm looking for. Theoretically the steel should work out as heavier, except that being unfamiliar with aluminium I was using thicker stuff than was probably required to err on the side of safety and so there probably won't be much difference in it. Working with the steel has already proved much easier than the aluminium, pieces are now all cut and bent to size using my templates, and I'm now making up some jigs to hold the steel square while it's welded. 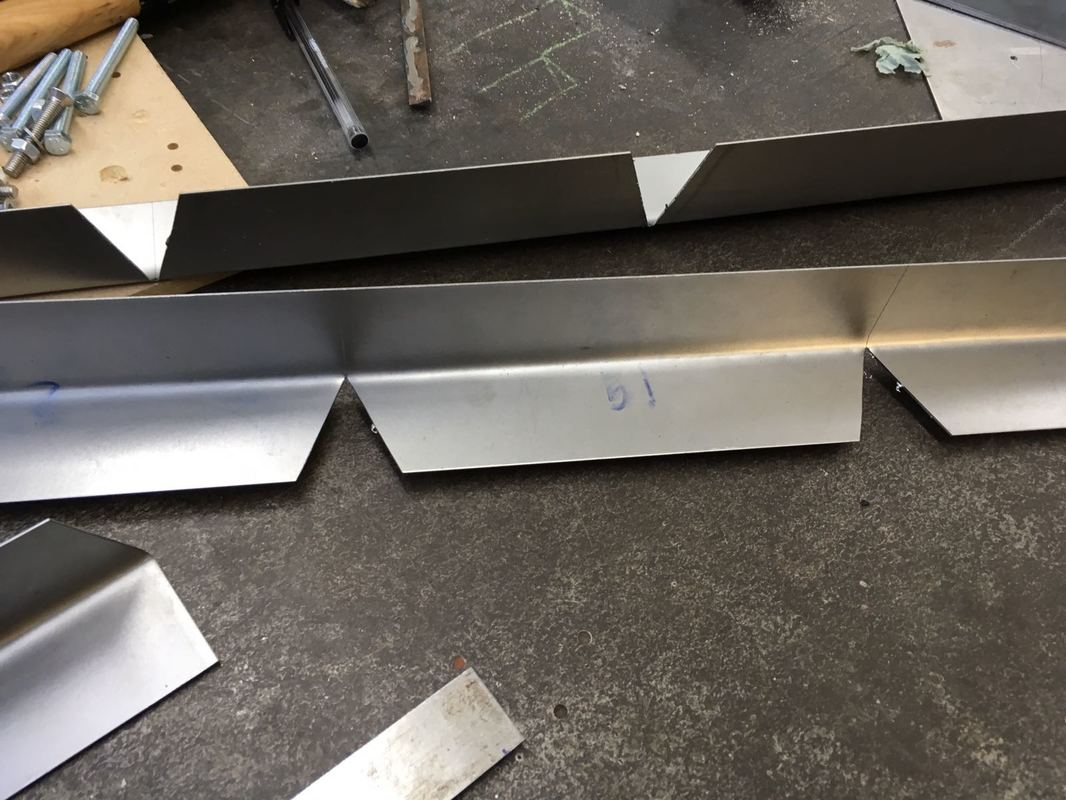 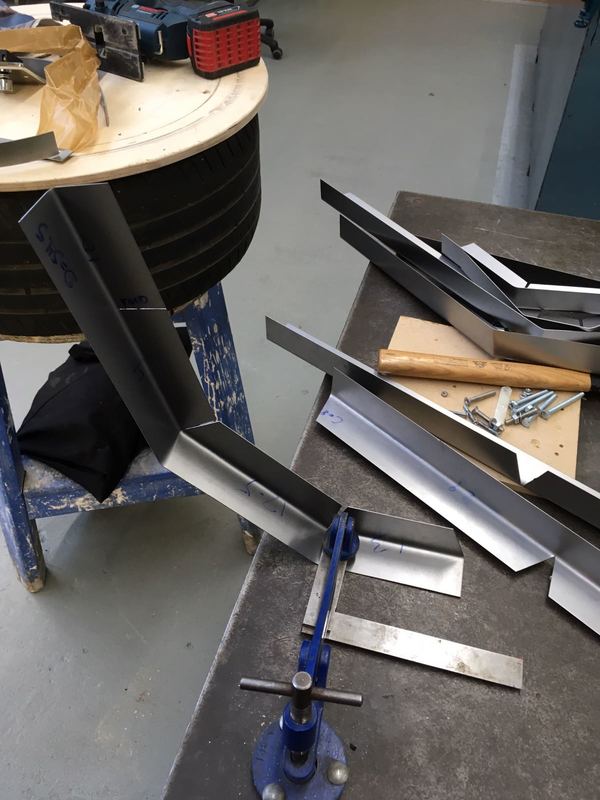 Having finalised the shape of the frame (including compensation for kickstart...) and fitted it to the bike I'm now able to start designing the luggage itself. 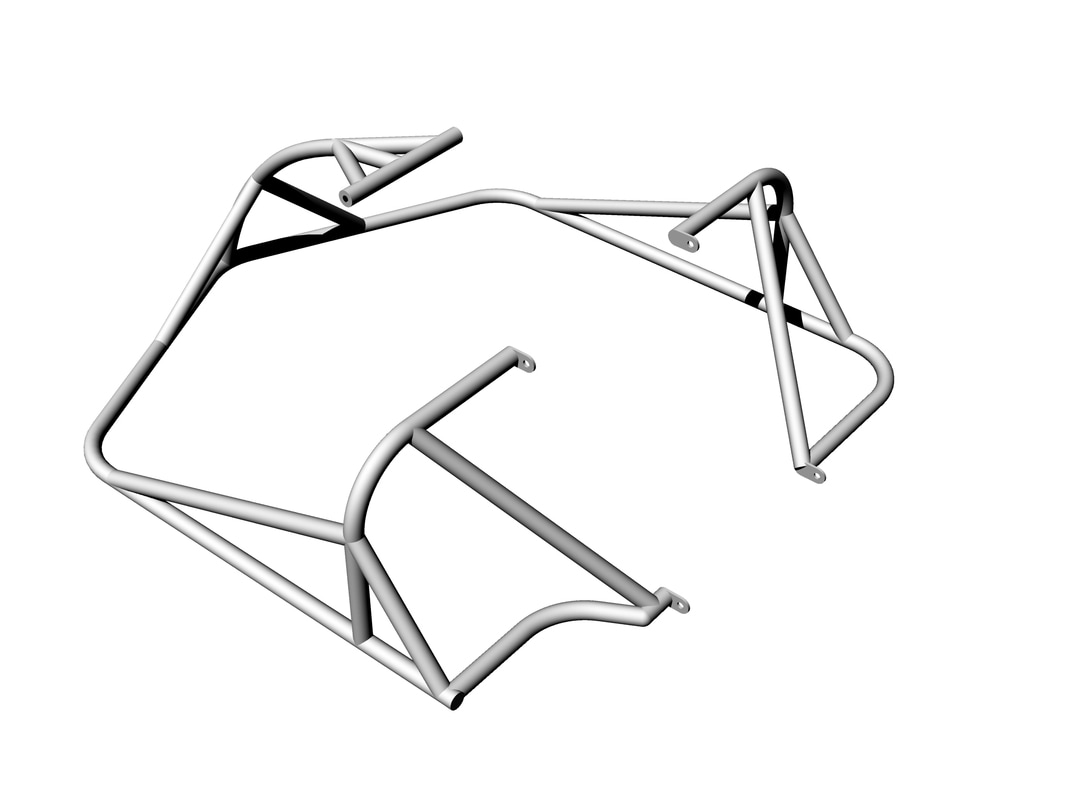 This might seem a backwards way of thinking, but in fact makes the most sense. The key dimensions of the frame were that it could be no wider than the handlebars and could only come so far forwards before interfering with either moving parts or the ergonomics of the rider whereas the particular shape of the luggage is secondary, so long as it is large enough, doesn't interfere with any parts, and is convenient to attach and remove. Now that the frame is fixed, the luggage has been designed to fill the space between bike and frame and be removable through the gap left clear to the rear of the frame. 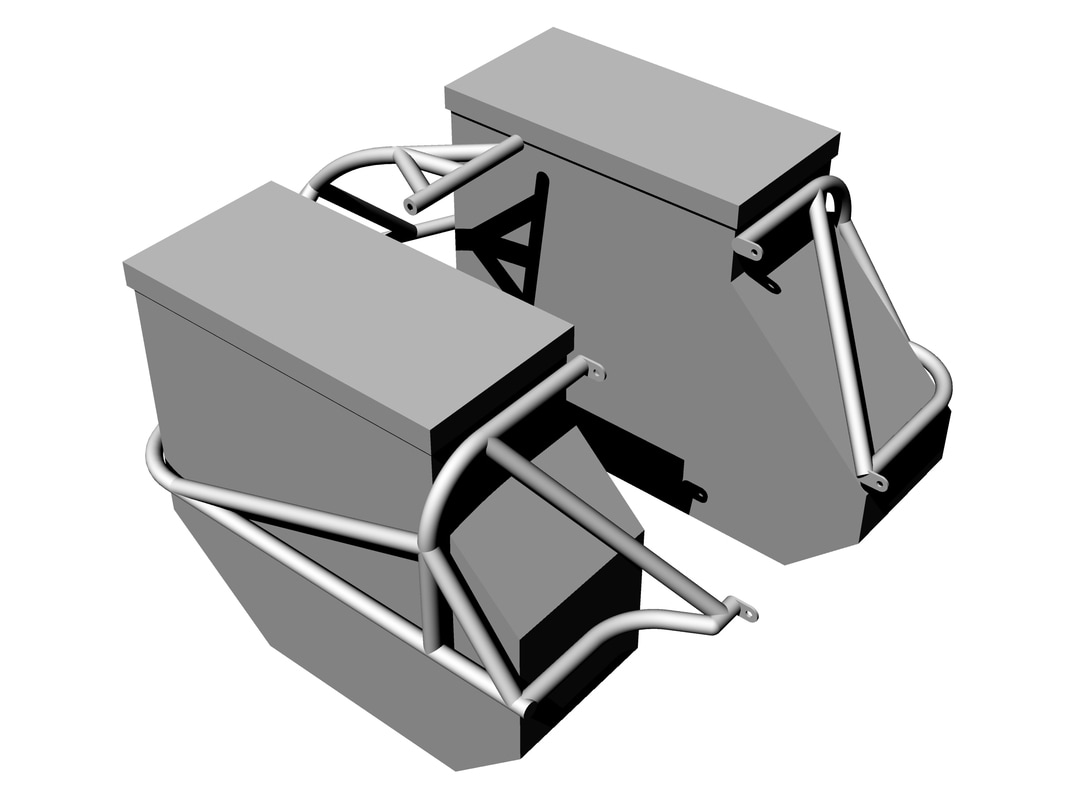 Although the fittings to mount the luggage onto the frame is still being finalised there will be at least three attachment points to ensure the luggage is held rigidly. 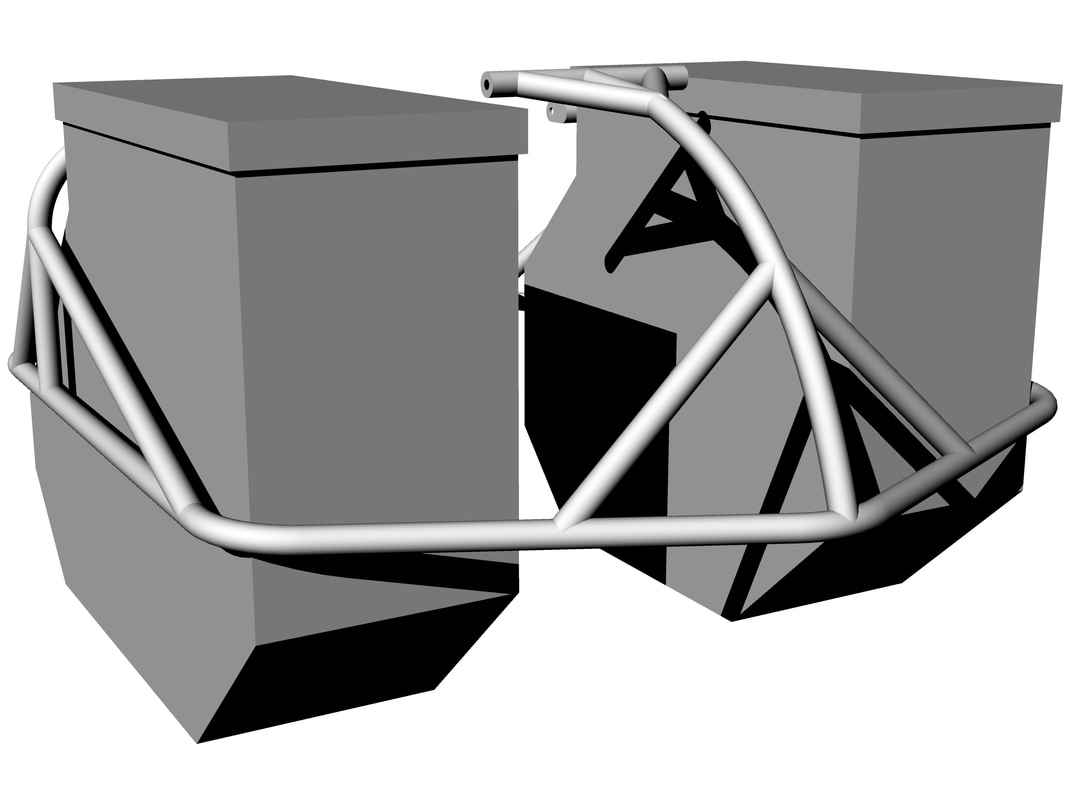 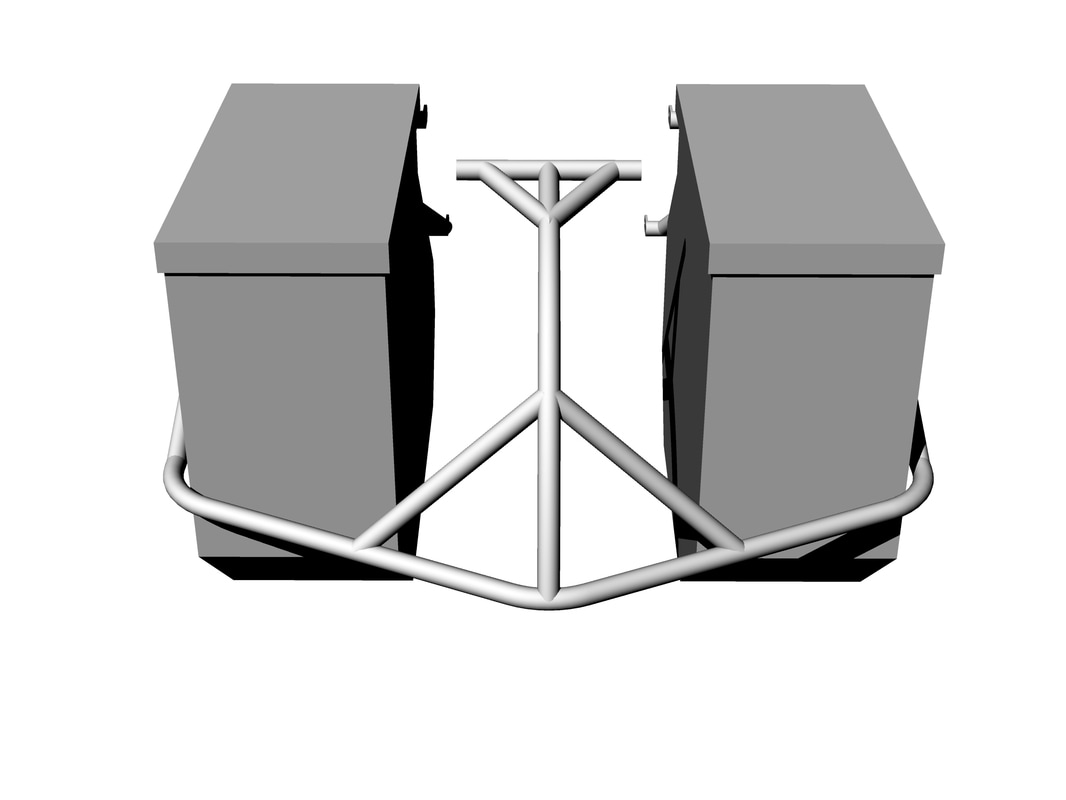 With the outlines of the luggage determined I've been able to start cutting and bending the thicker aluminium angle that will form the stronger edges of each box. The panels themselves will be lighter weight and riveted in place. The technique for cutting the aluminium corners such that when folded to the correct angle the two edges met along their entire length for easy allly-welding took a while to perfect. The best method it seems is to cut a 43° wedge on the bandsaw if a 45° bend was desired. This allowed for the overlap at the very tip of the wedge where the bandsaw cut doesn't finish perfectly sharply, but instead as a rectangle with the width of the blade. With this 43° wedge removed the angle then bends perfectly to 45°. 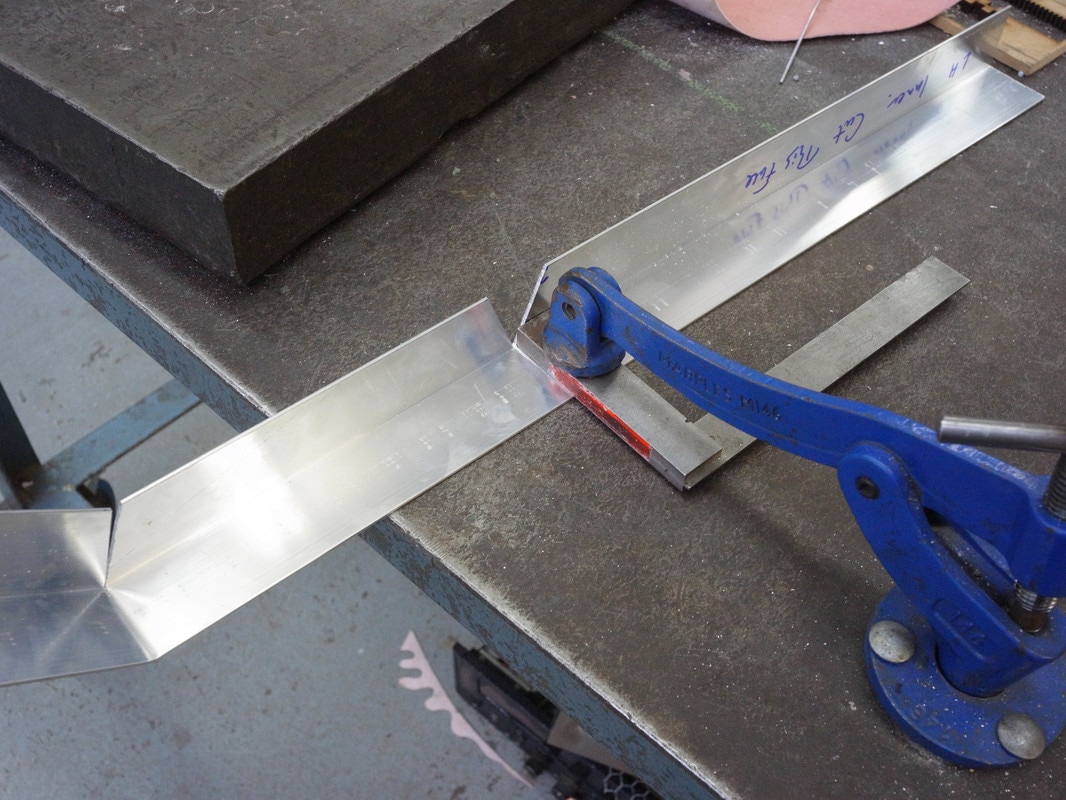 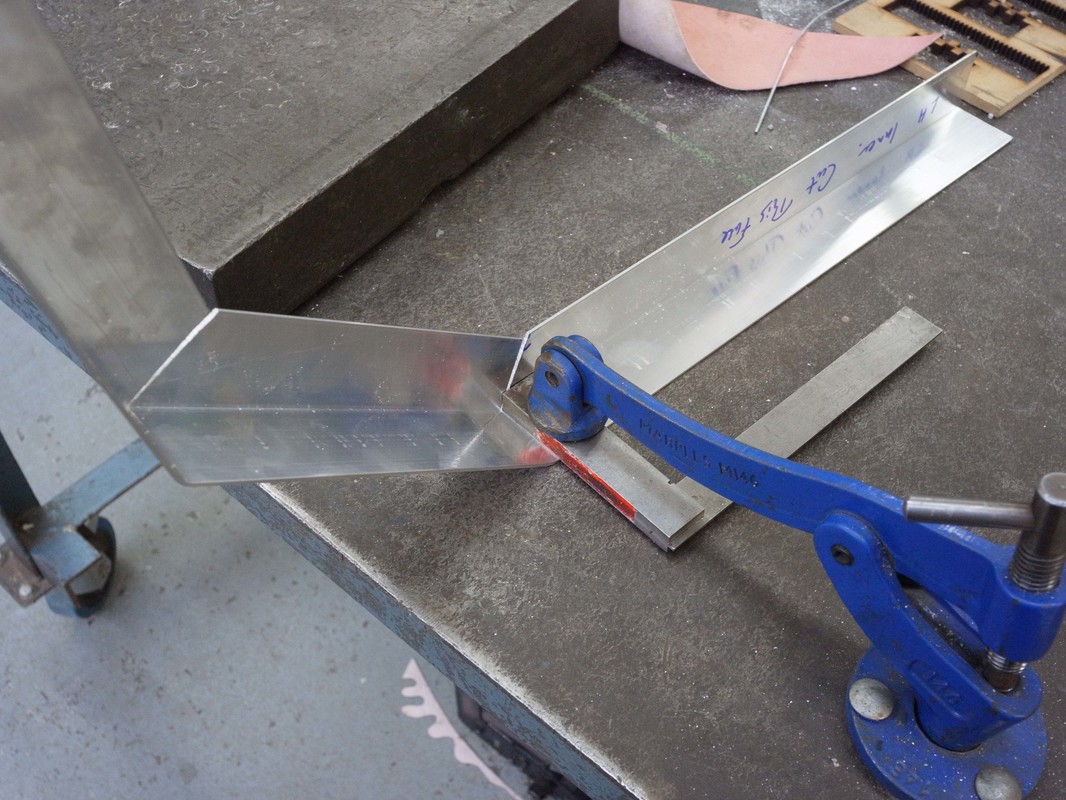 I had intended to talk about the design process for the rear frame that holds the luggage, but that was before the constructed frame threw up some issues that I hadn't taken into consideration at the very beginning. The design is unusual in that the frame goes around the luggage rather than underneath the luggage. This serves to centralise the weight of the luggage by carrying it closer in and also acts as crash protection so that the frame rather than the luggage itself takes the brunt of any fall which allows the luggage itself to be of a much more lightweight construction. In brief, the outline of the frame was originally laid out in wire on the bike itself, to check clearances and ensure the visual lines of the luggage frame matched those of the bike frame itself. This outline was transferred into steel that I formed with a tube bender and then welded up using oxy-acetylene to the second mounting point so that the frame was strong but at this point still quite flexible. Once the positioning of the frame was set it was then triangulated for stiffness and additional strength. This added strength is such that the frame is now stiff and strong enough to lift the rear of the bike off the ground from a corner with very little detectable flex. 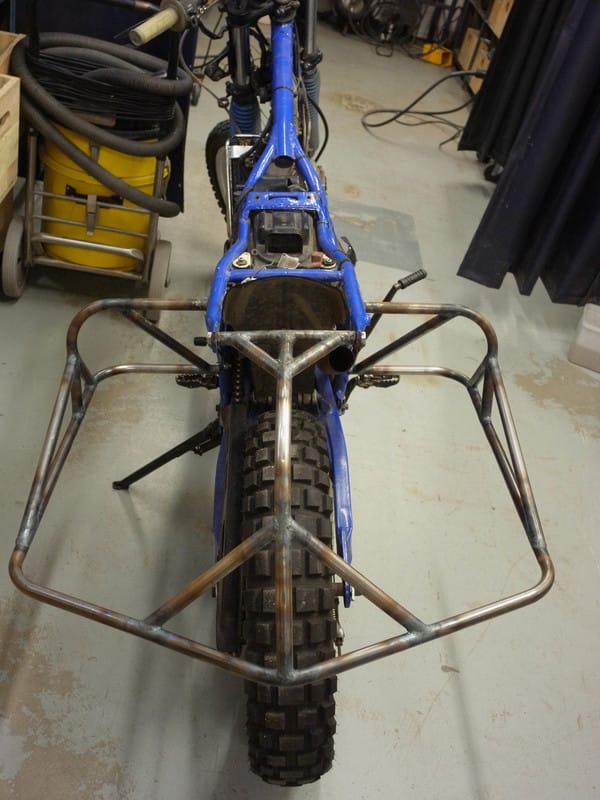 It was only once the structure of the frame was complete and my mind was moving to starting to build the luggage to fit inside the frame that I noticed a serious flaw in its design. Missing from the factors I took into consideration when designing the frame (e.g. exhaust position, body position of the rider, suspension travel, access to luggage, crash protection, etc...) was the travel of the kickstart and whether the frame interfered with it. Without any cause to start the bike for some months while it's being torn down then built back up this may have gone unnoticed for much longer but the realisation I had missed it struck me in bed early one Saturday morning... The travel of the kickstart was only just interfered by the frame: 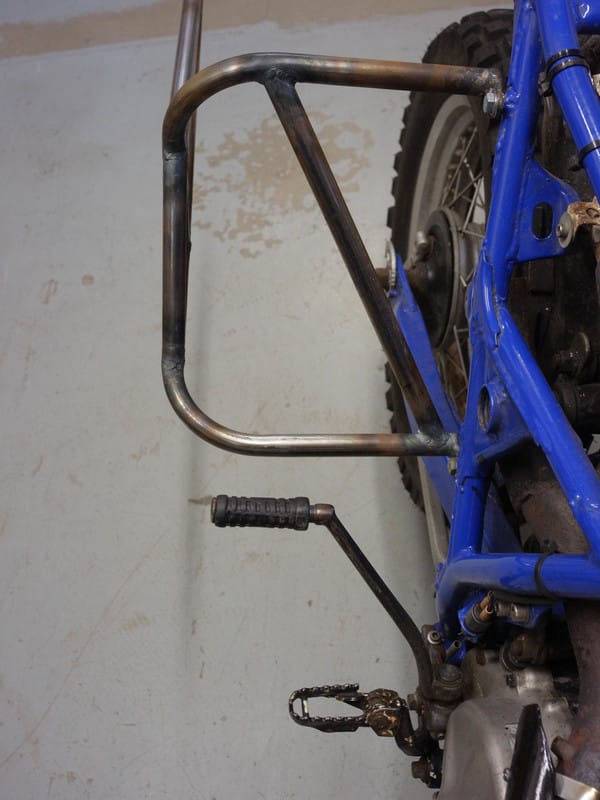 ...but that was without taking into account the heel of the rider hanging off the back of the level while kicking. A remedy would have to be found. By welding in a piece further back then removing the original line I would be able to remove the original the frame would retain the original mounting points and lose only a little luggage space behind it while ensuring the frame did not interfere with the kickstart. 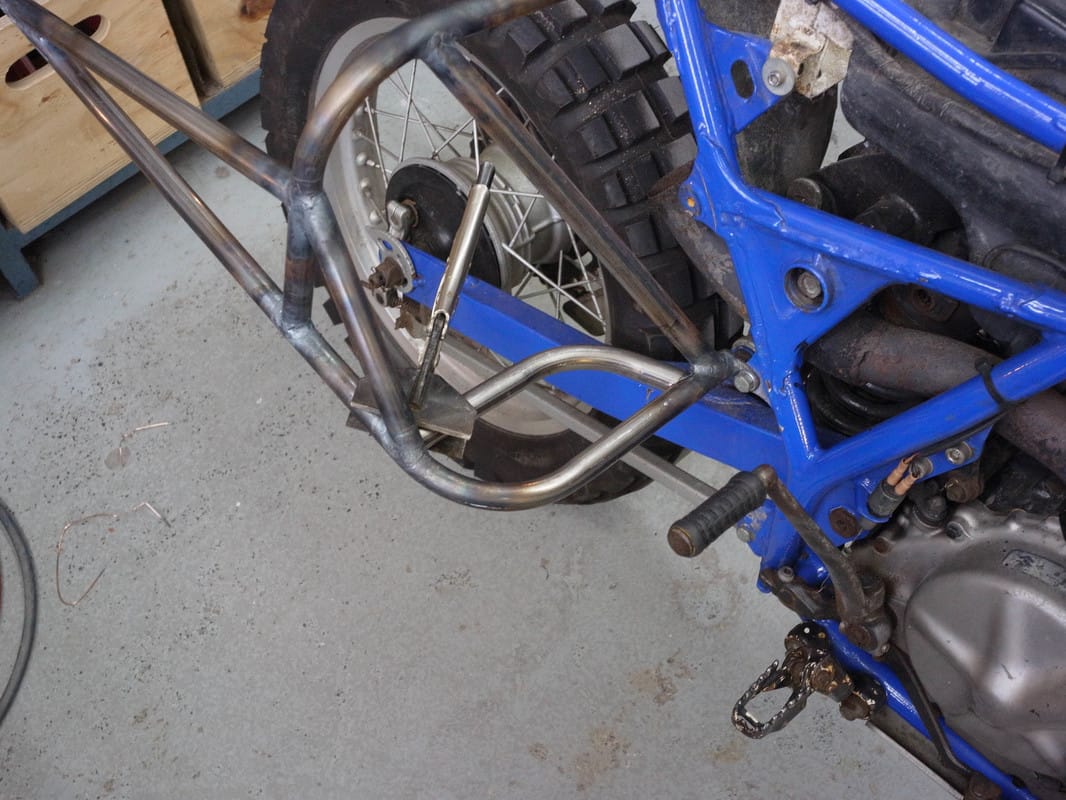 With the new line welded in and the old cut out I then welded in caps to the ends of the tube: 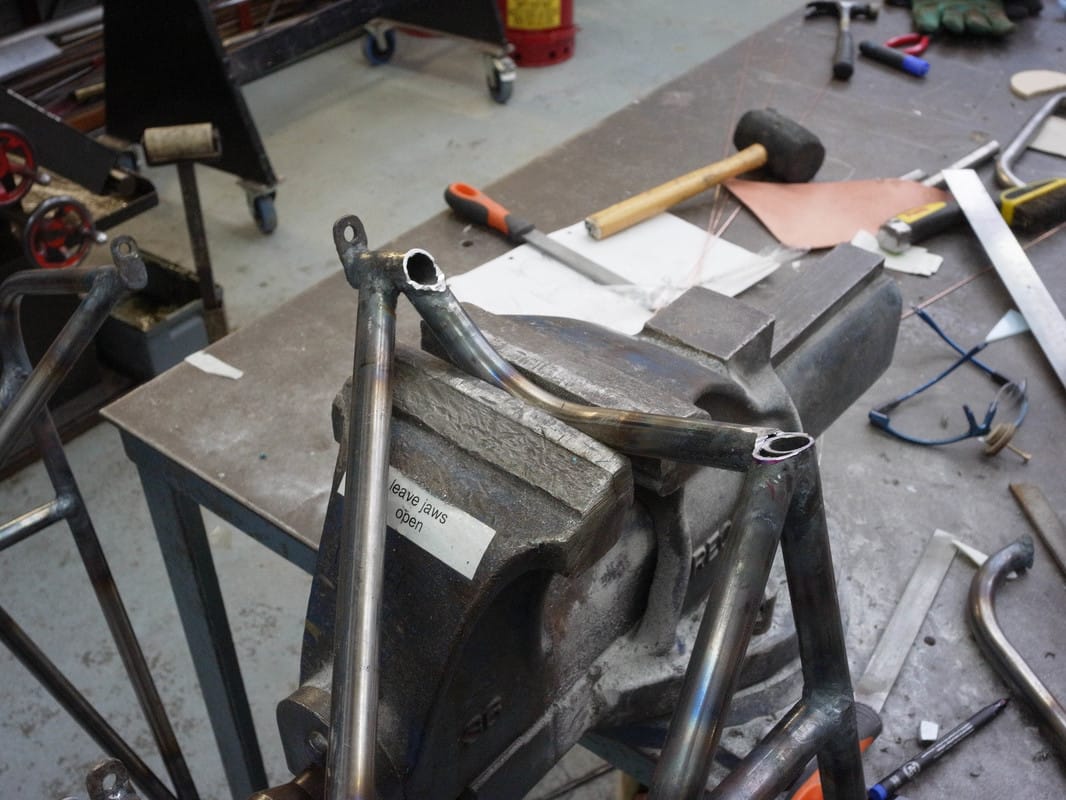 Which when mounted back onto the bike gave all the necessary room to kickstart levers and heels: 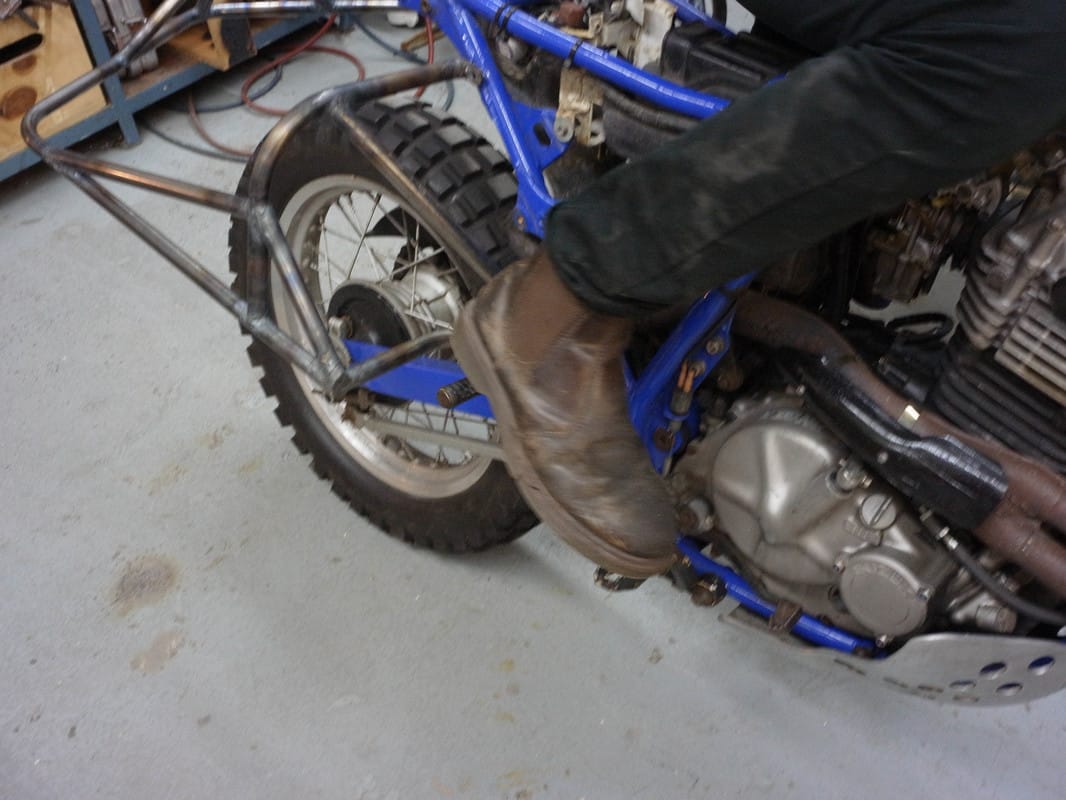 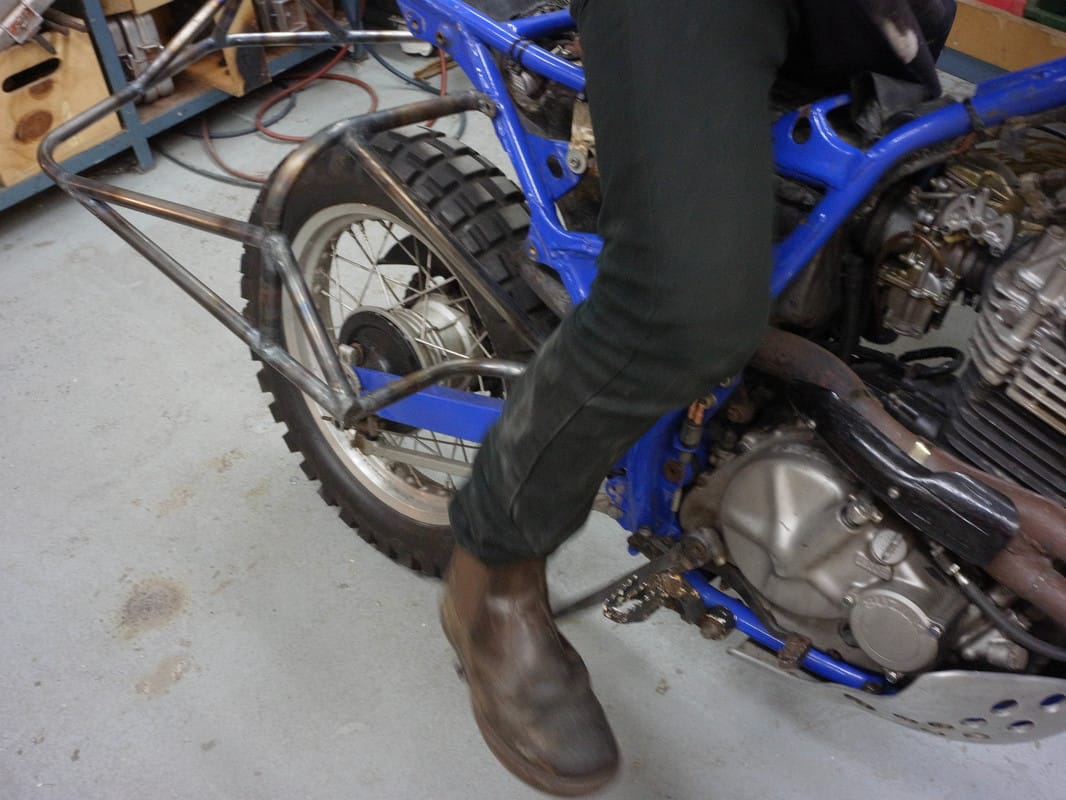 The front fairing must shield the rider from wind, hold the headlights, and mount the instrument cluster, including GPS and maps. I'll be making mine in sheet aluminium, because for a one-off bike like this it suits my process very well. The ideal material might be a super-tough polyethylene plastic like road furniture is made out of, but the manufacturing process is one that is only viable at scale. Aluminium does present its own problems though, chiefly that it's tricky to weld. The aluminium welding process is a hybrid between brazing and oxy-acetylene welding steel with a rod, so I've invested a lot of time in the last week practicing both before my aluminium welding goggles arrive and I can get used to the true process. These special goggles filter the light in such a way that it's easier to read the temperature of the aluminium when welding, rather than just blocking all wavelengths like goggles for welding steel do. 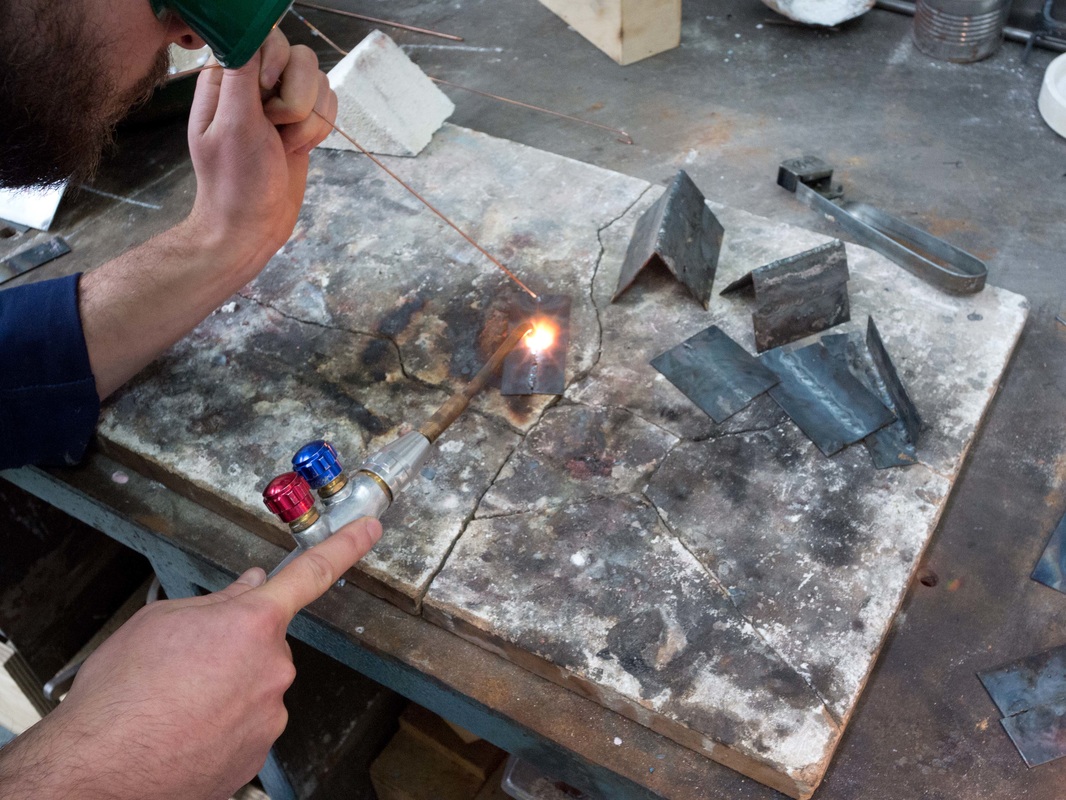 Oxy-Acetylene welding thin steel sheet 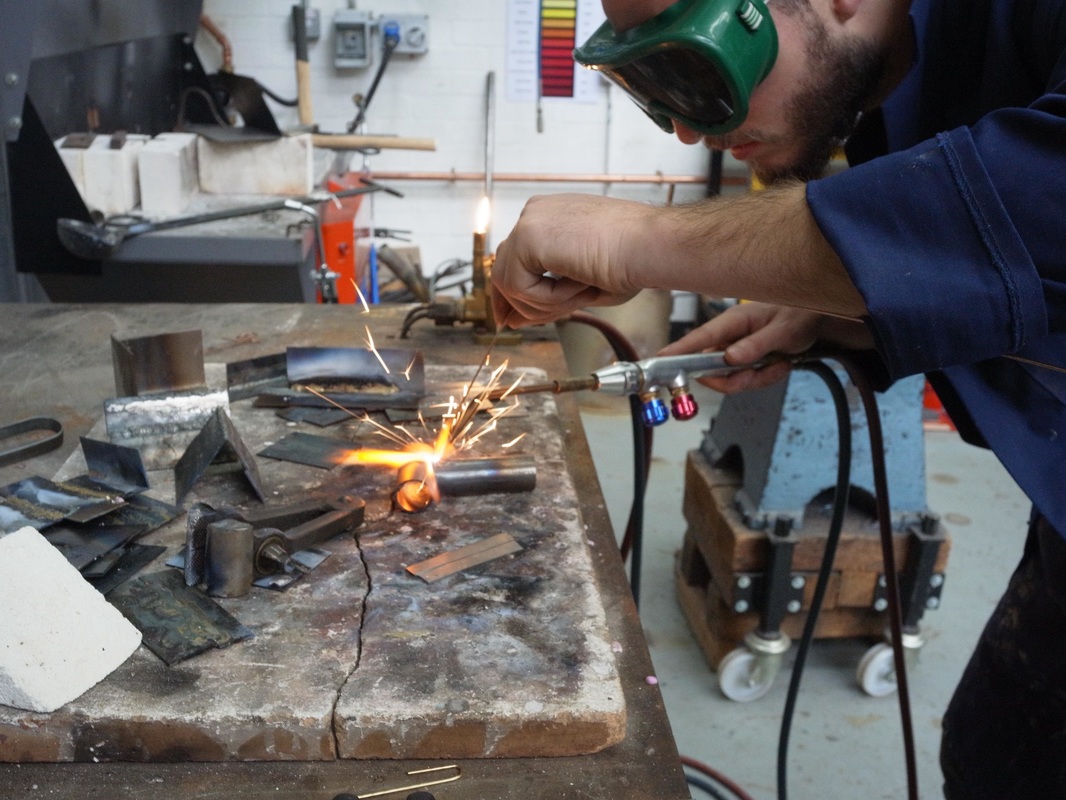 Oxy-Acetylene welding tubular steel The fairing will be built in a similar style to classic Dakar desert racing bikes. That is, quite tall, sweeping round to meet the fairing, and mounting the navigation aids high and near your eyeline for quick reading. 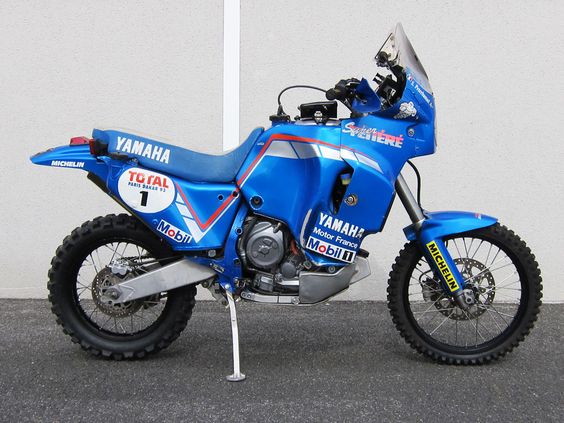 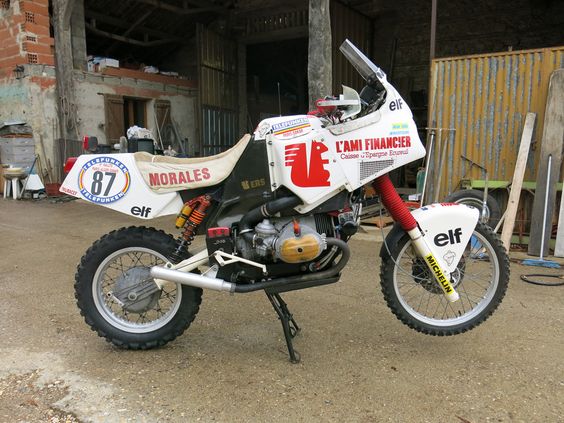 I'm initially prototyping in cardboard and hot glue. I found it very hard to design forwards from the tank, but much easier when I started to shape the front of the fairing first then worked backwards towards the tank. The prototype is perhaps a bit too angular and not broken up enough at the moment. It's overall impression is very blocky... It will have at least some of the edges rounded off and joined together so they flow better. The aluminium will also be cut as a 'net' so as to reduce the number of welded edges. This may cause a bit more wastage in the material but will certainly help with rounding the fairing and avoiding an excess of hard angles. Some of the surfaces will also be rolled but its hard to demonstrate this in cardboard. 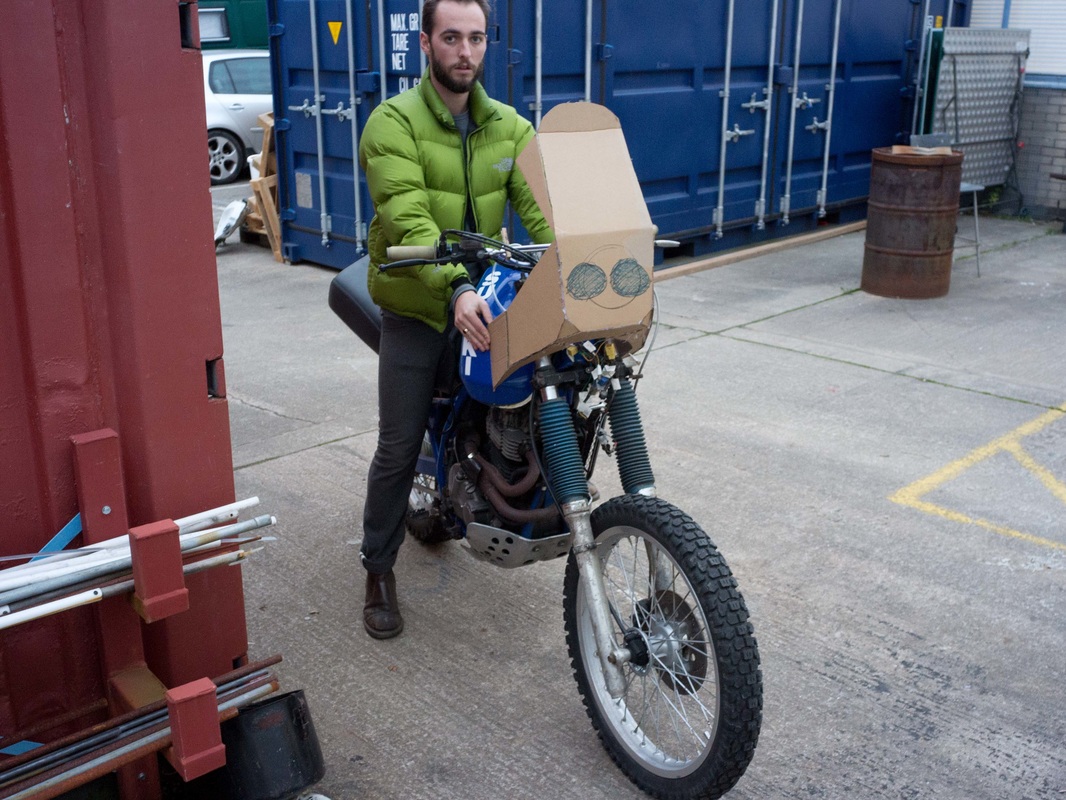 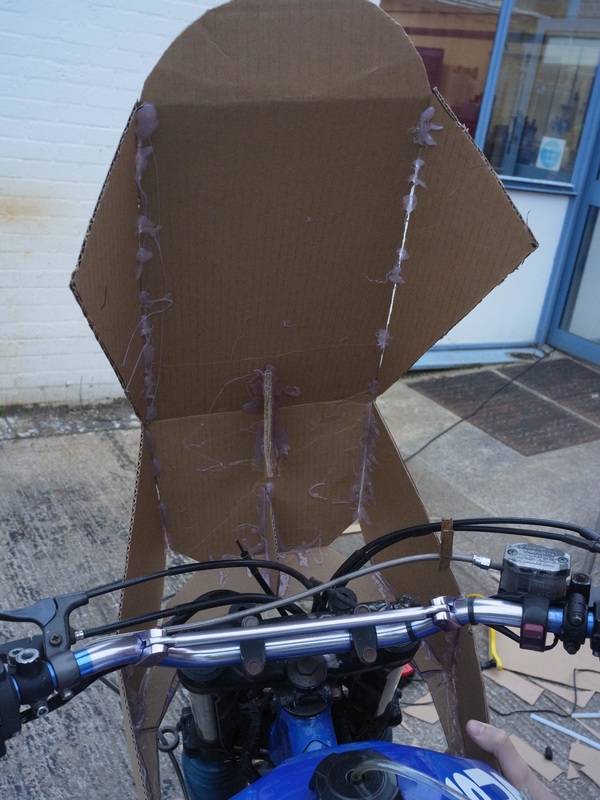 In my previous post I discussed some of the reasons most modern adventure bikes are less than ideal to long distance off road travel. The question then is what would fulfil the criteria laid out... The ideal bike must be tough, light and not overpowered, carry its weight centrally, be easy to work on with basic tools, have a long fuel range, and be comfortable. I'm going to base my working prototype on a Suzuki DR600, and not just any Suzuki DR600, this Suzuki DR600 built in 1986! 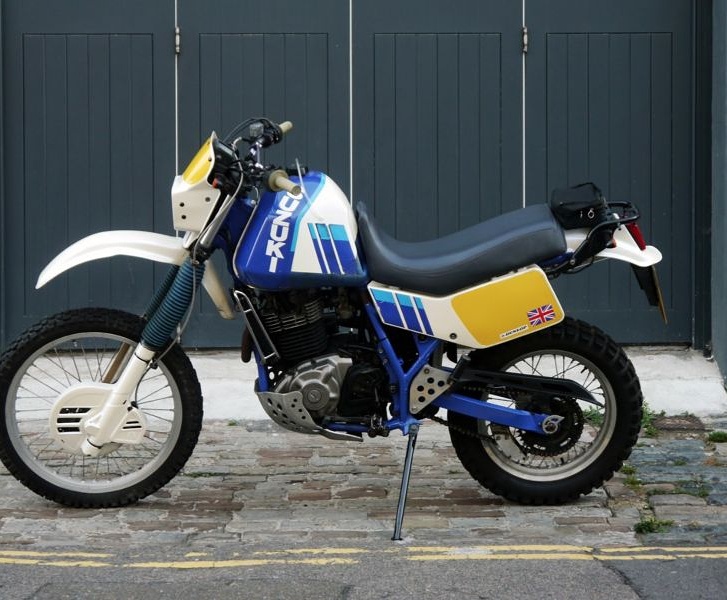 So why have I chosen this bike? It's already well regarded as long distance off roader and matches many of my criteria. With some work it will match all of them. The end result will
In subsequent posts I'll go into more detail on some of the modifications I'm making and how they're being fabricated. With access to well equipped workshops I intend to do all the work myself. In the meantime I've managed to tear myself away from riding the thing and the strip down has begun. The major parts of the frame, engine, suspension, brakes and most of the controls are perfectly good, but the rest (silencer, subframe, parts of the main frame, plastics, and tank) has got to go.  This project to turn a 1986 Suzuki DR600 into a competent long distance exploring package is born out of the potent combination of two things: -A long held desire to 'build a bike' -A niggling frustration at the vast size, weight and complexity of both modern 'Adventure Bike' packages and older bikes converted to the task of true overland off-road (or at least off metalled roads) exploring. The desire is easy to explain; who doesn't!? But the frustration might take a little longer. Let's start by looking at three of the most highly regarded 'Adventure Bikes': BMW's 108hp 1200 GS Adventure: 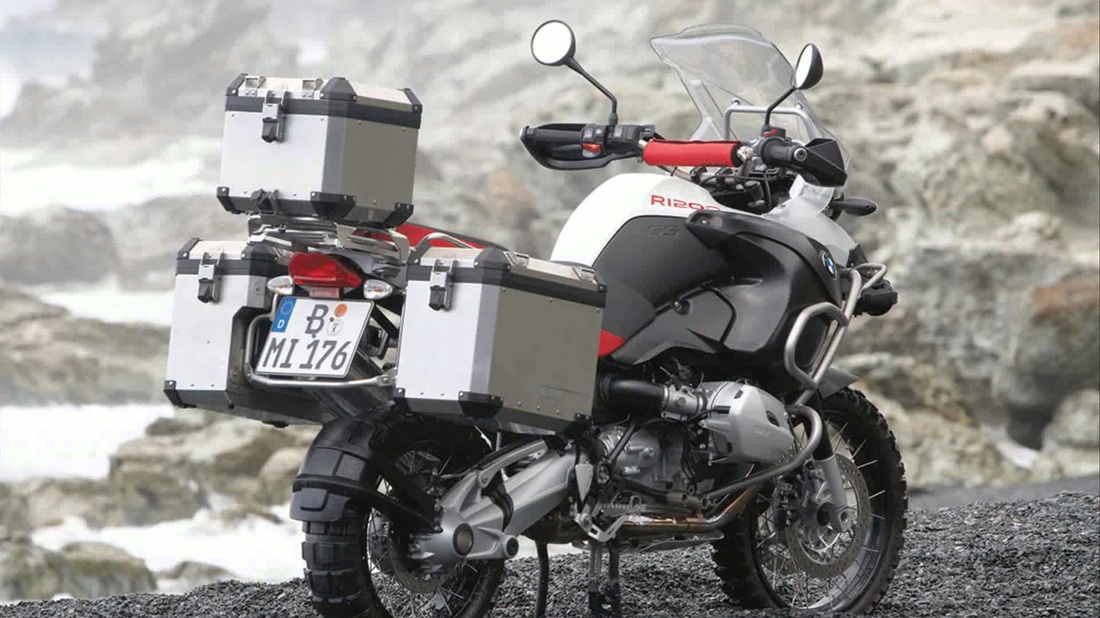 KTM's 150hp 1190 Adventure: 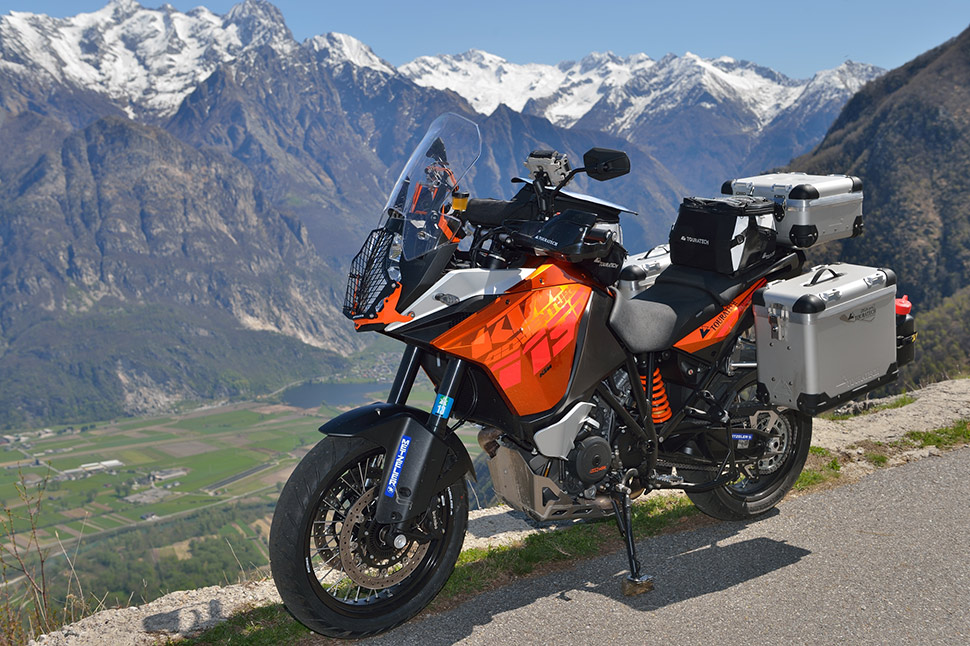 and Honda's new 95hp Africa Twin: 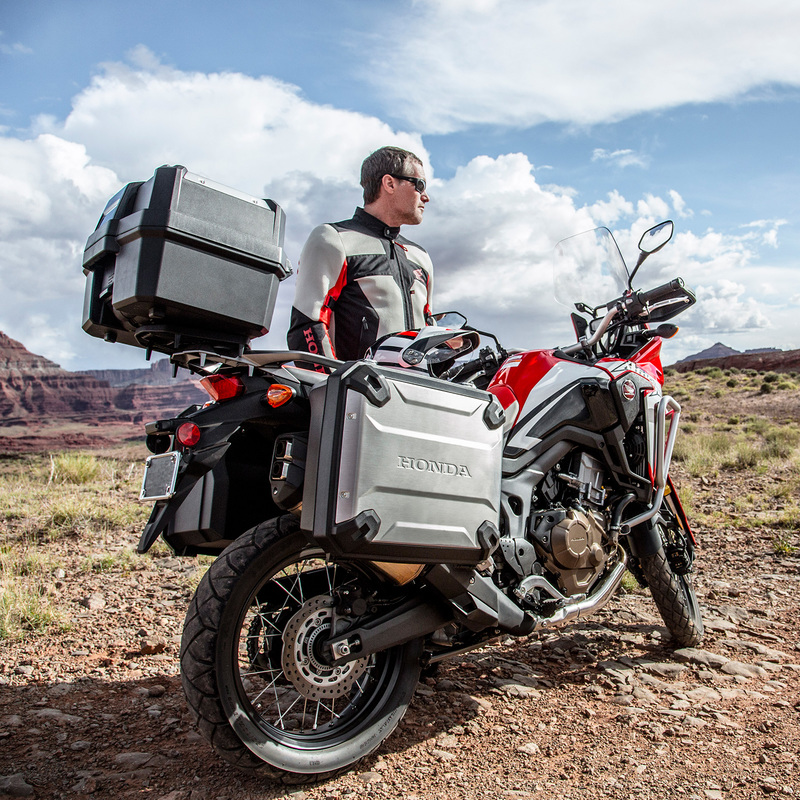 All three have been compromised by the demands of the market. Very few buyers use these bikes in the ways their looks might make you believe they're designed for. All three are overpowered, complex, immensely wide when loaded and carry that load very high. Let's think about each fault in turn... Overpowered The modern motorcyclist expects vast amounts of torque and power on demand, perfect for fast road use but totally unnecessary off road, especially long distance. Complex Neither buyers nor manufacturers can really be blamed for this. EFI and ECUs all make a lot of sense with garages and breakdown services never more than a phonecall away but make things rather harder to fix if anything goes wrong far from your local dealer. Wide Luggage packages for these bikes must fit onto racks, and these racks must fit around panels. And these panels must go over exhausts. And the stock silencers on these exhausts are generally large. High To retain space for a pillion passenger these bikes are forced to move a lot of the luggage far back and high up which compromises handling which would be much improved by a more centralised weight. Probably the most enlightened of modern manufacturers when it comes to 'proper' adventure bikes is CCM. Yet even their best effort, the GP450 Adventure isn't ideal in some areas. 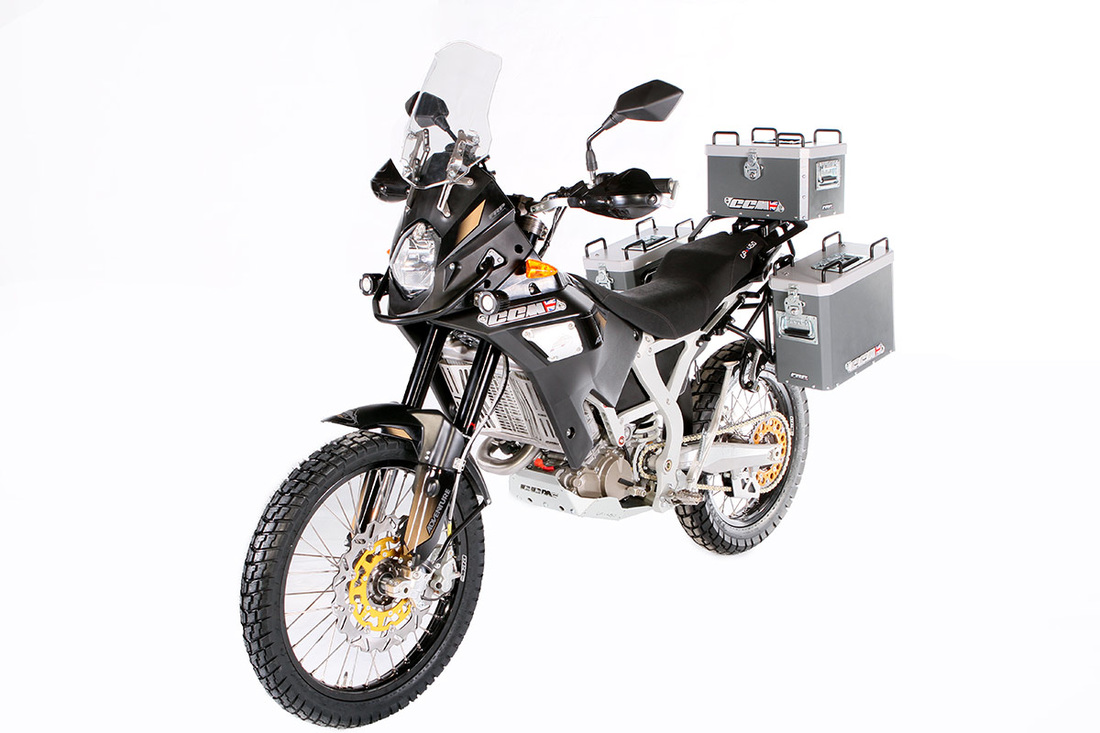 It's certainly not overpowered with the 40hp it derives from a 400cc single borrowed from Suzuki's water cooled DRZ, a figure I think is probably close to the realistic ideal for off road riding. The GP450 is also very light thanks to its aluminium frame, a benefit which cannot be overstated when it comes to terrain where the bike is guaranteed to be dropped at least a few times.
However it is still compromised in terms of how it carries it's luggage (forced to fit above and around all of pillion, frame, and exhaust) and also by the complexity of its water cooled EFI and ECU controlled engine. The last is only a very minor niggle though. So what's the solution to all these compromises? A topic for the next post. |